There were a lot of things we wanted to accomplish but not everything was a goal – some were simply building blocks. To make better sense of this, I decided to commit to three goals that were specific, measurable, attainable, realistic, and timely – otherwise known as “SMART” goals.
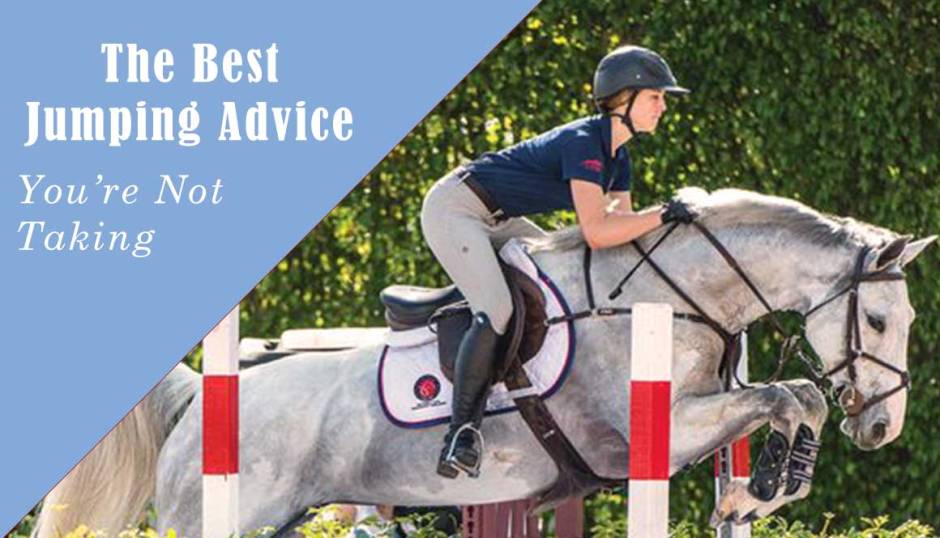
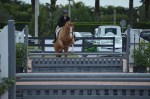
After nearly a decade out of the show ring, I made my return to show jumping as an adult amateur with my new 7-year-old mare, Cassandra, during week five at the Vermont Summer Festival.
When you have an older horse, you know that one day they won’t be able to jump as high, go as fast, or carry you as far – but you never anticipate it when that day actually arrives.
Working across the street from a show barn has its benefits – like regular clinics to help tuneup my riding. However, it took me two years before I actually signed myself up because I figured that others who were competing could benefit more. Thankfully, Linda was my trainer when I was a junior and insisted that I participate at least once – for old time’s sake.
Since I moved to Connecticut, my rides have averaged a total of 25-30 minutes and take place at either 6:30 am or 5:30 pm (before or after work hours). When it came to the day of the clinic, I felt somewhat out of shape and worried about my horse’s stamina (or maybe just my own!).
If you seriously competed – in any sport – I’m sure you still have your coach’s voice in your head, yelling certain “words of encouragement”. For me, that voice has always been Linda’s and those words of encouragement include:
Get it done – TODAY! Impulsion, Impulsion, Impulsion. Do it again to make sure it wasn’t a mistake. Don’t just keep going, understand what’s going on.
Those words in my head, and the words I suddenly experienced myself hearing in person again pushed me through the two hour clinic no matter how much my back was screaming at me.
Walking Through the Clinic
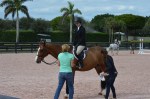
We started the clinic warming up – working on transitions, circles, pace, bend, light seat, and impulsion. After a few serpentines at the trot, we stepped into the canter and completed the shallow serpentine in the new gate.
This challenged our horses to maintain their balance and their canter lead, especially at the top of the serpentine when the horses had to hold a slight counter-bend. For my horse, Honey, it’s much easier for her to do a lead change than hold a counter bend or lead. While this exercise was more difficult for her, it forced her to balance using her hind-end and she became much softer and more supple.
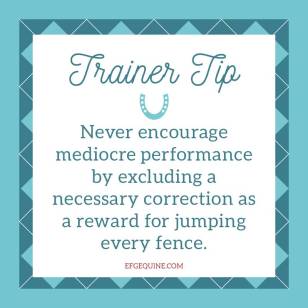
The next exercise was a set of two ground poles set six strides apart. Honey loves to run and pull when it comes to anything she can jump, poles included. I tend to hold her back on the approach to offset her “go” on the landing. Instead, Linda encouraged me to ride her out of pace and correct her in the middle of the line to make the six strides work. I was allowing the bad behavior to occur by covering it up instead of correcting it.
You can see my correction in the middle of the line during the video, as well as her grabbing the bit and leaning against my hand after the second pole. Below, Linda works on my canter corrections, coaching me to “elevate my hands higher than what’s comfortable” to keep Honey’s head up and shorten her stride.
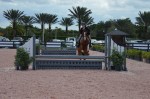
After working through our canter corrections and canter poles, we began warming up over a single fence. The reason I included our warmup jump video is because you can see where the corrections we practiced on the flat clearly apply to our work over fences. As soon as I land, you can hear Linda say, “elevate your hands – higher, higher!”.
Next, we started on a combination down the other long side. It was set to be ridden in a quiet four strides to an even quieter four strides with an oxer in the middle. Again, you can see the flatwork interwoven in this combination as we jump in out of pace (a little long), make the corrections between the jumps, and then do our flatwork on the landing. Linda wouldn’t let us walk until Honey had shortened her stride and come back to me because, the training after the jumps is just as important as the training over the jumps.
What I love about Linda’s lessons and clinics is that she’s purposeful in the sequence of exercises. Each exercise builds on the other and eventually they come together to create a course of jumps that shows you how much of the lesson you have retained and mastered.
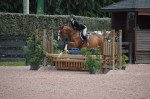
We continued to build the course and challenged ourselves to maintain our position and our integrity despite fatigue in a final course of the clinic. As you can see in the video below, Linda adds a circle before we finish our final line of the course. Honey was building in pace and beginning to get away from me; Linda always tells her students, “every time you get in the saddle you are teaching your horse something – you are always training”.
I cannot stress enough how important it is to ride the ride you get. A circle wasn’t part of the course, but my ride got away from me. Had I kept going, our last line would have been a fight to get done. The same goes for the halt at the end – typically you finish a course with a closing circle, but I had to fight to get the last four strides so allowing Honey to continue building would only teach her that it was okay. By using a halt as a correction, she will [hopefully] learn to come back to me after the jumps.
I hope my clinic videos have been able to help explain a few things:
Flatwork is just as important as jumping – and should always be weighted equally.
Whenever you get on, you teach your horse something – make sure it’s something good.
Clinics are beneficial for all riders, even if you don’t compete!
P.S. For those of you adults who also experience back pain while riding, I highly recommend consulting a chiropractor. Since I started my adjustments I’ve been able to ride without pain for the majority of my rides.
I’m thankful to be writing this after enjoying an afternoon trail ride with my mare, Honey. Typically, she won’t go out alone, but we are following social distancing recommendations and decided to give it a try. Much to my surprise, she seemed to enjoy herself and never motioned to turn around or cut our trail short!
I know many people aren’t as lucky, and some barns have been forced to close due to the COVID-19 pandemic. That said, there’s a lot we can do as equestrians to keep our bodies prepped for when we can get back in the saddle again.
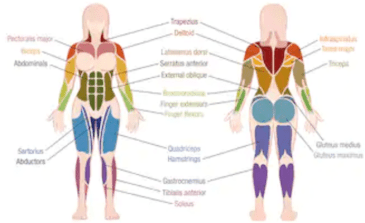
Before we get started, I want to review all the muscle groups engaged while riding:
Hip Flexors, Abductors, and Adductors
Groin Muscles
Glutes
Quadriceps
Calf Muscles
Shoulder Blades
Back Muscles
Abdominals
Noelle Floyd does a really nice job discussing how we use each of these muscle groups while riding, but for today’s purposes, I want to simply bring awareness to how much our body works while we’re in the saddle.
My biggest recommendations for riders at home are to:
Stretch daily.
Keep working your riding muscles.
Create a plan with your trainer for when you return.
Stretch Daily
As a lifelong rider, my body talks to me – a lot. My hips are tight, my low back is in [almost] constant pain, and my hamstrings always need time to loosen up. I’ve learned to never underestimate the importance of stretching when it comes to skeletal alignment, posture, balance, and overall comfort. That said, I love this video from Blogilates that walks you through a great daily stretch routine to help relieve stress and increase flexibility in your hips and legs.
If you’re tight and looking for a full-body stretch, this is another video that you may want to cycle into your stretching routine.
Work Your Riding Muscles At Home
You may be worried that all the hard work you put in to prepare for this summer show season is now being wasted in quarantine. Try to push those thoughts out of your mind and focus on what you CAN do.
I am a member of Barre3, and I absolutely LOVE it. It’s a great, low impact way to work and tone my riding muscles. However, if subscribing to a new service isn’t what you’re looking for, there are plenty of exercises we can do at home to stay fit for riding.
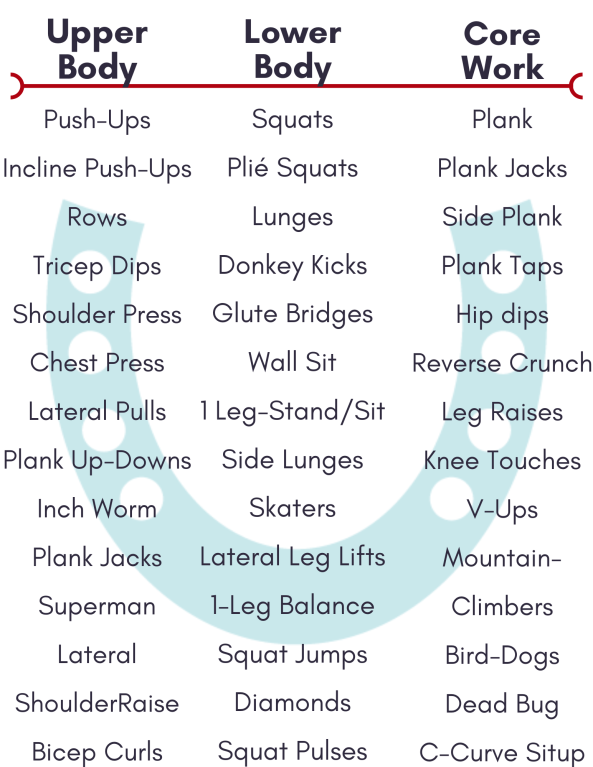
In all of my workouts, I incorporate some variation of the following:
Warm-up (get your heart rate up)
Circuit 1 (3 exercises, 3 times through)
Circuit 2 (3 exercises, 3 times through)
Core Work
Cool Down & Stretch
When you’re creating your circuits, make sure you include a variety of upper and lower body exercises. Aim to do 8-12 repetitions of each exercise, three times per circuit.
I also recommend finding other types of workouts to keep exercise interesting. Livestream classes are popping up all over Instagram and Facebook feeds as local fitness studios try to keep their customers engaged – take advantage of those!
Bandier, a fitness brand, offers live classes every day at 4:00 pm featuring different kinds of workouts led by fitness professionals.
Barry’s Bootcamp also provides interval and cardio workouts that have become popular in many of our major cities.
Yoga from the Heart has a variety of live yoga classes each day. In general, yoga is another great way to combine strength work with stretching and core stability.
Make a Plan with your Trainer
This last one is to help both you and your horse when you can finally get back into a regular training routine. Depending on your quarantine restrictions, you may need to modify your show schedule for the summer and determine what your horse will need to get competition ready.
Some questions you can ask your trainer are:
How many rides should I do per week once the barn reopens?
How frequently will my horse and I be able to lesson?
Will my horse need any training rides?
When is it feasible to start showing again?
Remember, there are many unknowns about how long this pandemic will last and whether or not competitions will even take place this summer. Understand that your horse may lose some muscle if your barn is forced to close, and you will need to be patient with both your horse and yourself as you work your way back as a team.
Everyone’s circumstances will be different, but together we can support one another and make it through this just fine.
One-day horse shows have a certain connotation with them; they tend to run longer, be slightly disorganized and are mostly less competitive. Barns generally use one-day shows to qualify for state and regional finals or to acquire enough points to be eligible for some of the larger national finals.
As the equestrian liaison at The Ethel Walker School, I felt compelled to watch our students show in the first competition of this academic year. We have students who have been training with barns across the nation and even in Mexico before they began riding with The Ethel Walker Equestrian Team, and today gave us a baseline to gauge against as our team embarks on the 2017-2018 training season.
As I watched trip after trip of hunter and equitation courses, from adults to juniors, I began to notice a trend. The riders who appeared to be more physically fit were able to produce more consistent jumping courses than those riders who had mastered the technical dissection of an over-fences class but lacked the fitness acumen to make the necessary adjustments while on course.
Today, I’m a jumper. However, I spent my entire junior equestrian career in the equitation ring. If I had to choose the most important thing to remember as an equitation rider, it would be: mastering the art of invisibility.
While you’re on-course, it doesn’t matter how you feel or what your horse is doing, your job is to make the ride you have, appear to be the perfect ride. Many riders mistake low hands and a quiet leg to mean soft hands and a light unbalanced. In truth, the only thing that changes between the schooling ride and the show ring is that your aids become invisible.
Part of mastering the art of invisibility is simply having the wherewithal to do it. The greater part, however, is having the physical strength needed to apply enough leg without kicking or twisting and to half-halt without changing your hand or body position.
Equestrians Need Some Time In The Gym
When you begin to think about training in the gym, you’ll want to consider these five things:
Leg Strength
Core Strength
Back Strength
Posture
Flexibility
Leg strength helps you ride from your leg and support your horse to create a more connected and confident ride for both horse and rider.
Core strength increases a rider’s ability to hold their position and support their horse without relying on their hands. It also helps to cover up questionable distances by being able to hold a position no matter what your horse is doing.
Back strength comes in handy with stronger horses when a subtle, invisible half-halt is needed.
Posture goes hand-in-hand with core strength but takes it a step further as posture focuses on your position as a whole. Ballet and/or Barre classes are an excellent way to improve riding position without even thinking about it.
Finally, flexibility is important because it keeps your muscles from tightening and causing hip and back problems. Many riders become uneven and negatively affect their horse’s balance because their bodies are uneven or too stiff. My top recommendation for this is to pick up yoga at least once a week. It’ll improve both strength and flexibility, which you’ll be thankful for as your training intensity increases throughout the showing season.
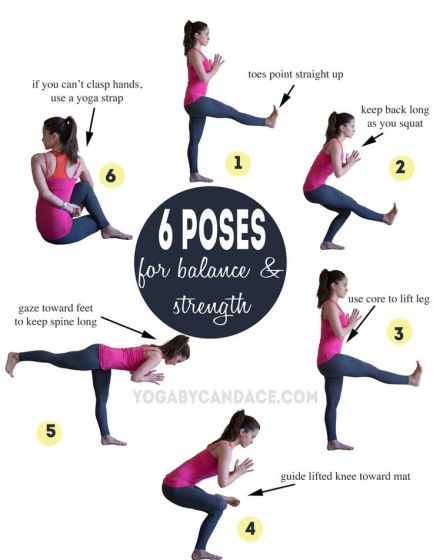
Gym Exercises for Riders
Aim for 3 sets of 10-15 repetitions for each exercise. For each workout, mix and match the lower body, upper body, and core exercises to create a five to seven exercise workout with three sets and 10-15 repetitions per set.
Balance Exercises – Yoga
Lower-Body Strength Training:
Squats
Lunges
Calf Raises
Leg Raises
*Use weights for an added challenge
Upper-Body Strength Training:
Tricep Dips
Bicep Curls
Chin-Ups/Pull-Ups
Push-Ups
Rows/Rowing
Wall Balls (Total Body)
Core Strength Training:
Abdominal Wall Sit-Twist (Use medicine ball or resistance for more of a challenge)
Planks (Regular, Side, Single Leg/Arm)
Reverse Crunches
Bicycle Crunches
Supermans (Lie on stomach with arms stretched forward and lift arms and legs up and back down)
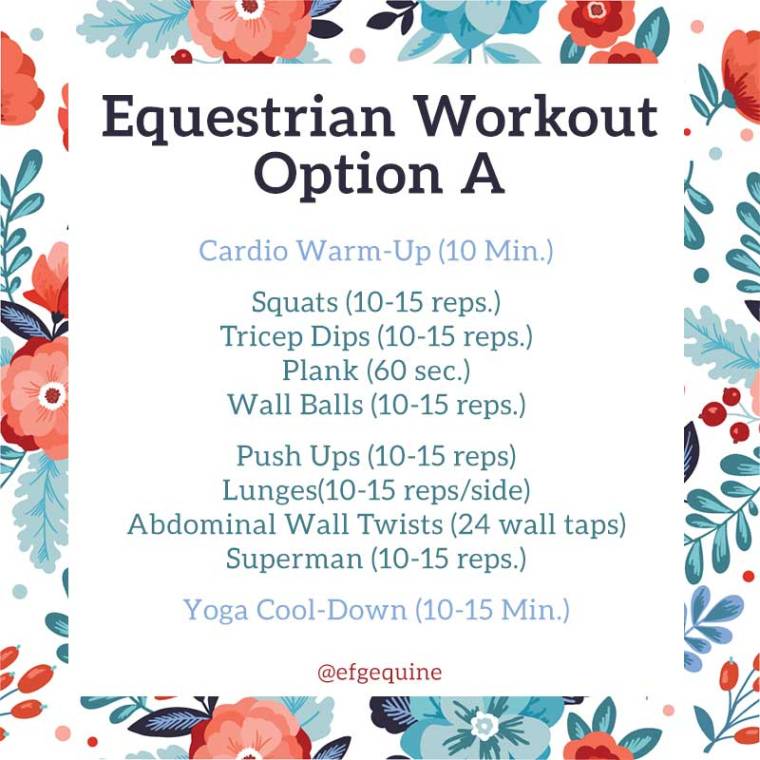
I am not a fan of cardio, but there’s no way around it if you want to improve your endurance and keep your heart healthy. Every week, I try to switch my cardio routine to keep myself interested and committed to a stronger, healthier lifestyle.
I hope you’ll join me in the gym! #equestrianworkout
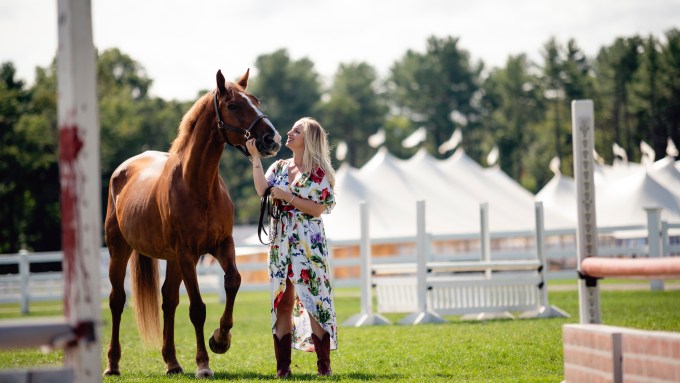
I recently picked up my life, and my horse, and moved us from Charlotte, NC to a small town outside of Hartford, CT. This isn’t a new place for either of us but it represented a change in our paths and our training.
Earlier this year, I was approached by the head of my former high school about a position in their Admissions Office. At first, I didn’t give it much thought as I had just started working with a digital marketing firm. However, as timing would have it, the position soon became my opportune next step and I am now an Admissions Associate at The Ethel Walker School, which included a stall for my mare, Honey.
I think Honey likes her new home – it’s a princess’s life for this chestnut mare!
As I settled into my office, Honey seemed to be taking in the horses around her. Instead of only lesson horses, she was now surrounded by A-Circuit show horses. After spending years as the largest horse in the barn, Honey now lives as one of many warmbloods instead of being the only one. While I can’t say this definitively, it certainly seems as though Honey’s competitive nature and desire for attention have put an extra suspension in her stride and scope to her jump. If I didn’t know any better, I’d say Honey was showing off.
So, how does this culminate into a lesson about going back to the basics?
Sometimes, when in a new place or taking on an uncertain adventure, the basics are where you will gain the most. While jumping the new fancy course or trying your hand at exercises left from earlier lessons may be enticing, the real work happens by perfecting the most basic movements.
Exercise I:
Begin by trotting a 20-meter circle at each end of the ring. Once perfected, modify the exercise by trotting a 10-meter circle in each corner of the ring.
If you pay attention during this exercise, you’ll notice that your horse’s balance may differ from straightaway to circle and from one point of your circle to another. This is an issue of self-carriage and straightness. Many riders, myself included, forget the importance of focusing on the simple things, like making a perfect circle, but it’s the simple things that make all the difference later on.
Exercise II:
Part A: Down the long side of the arena, show three transitions of your choice. Modify this exercise by adding the canter. Transition to a sitting trot around the short side of the arena.
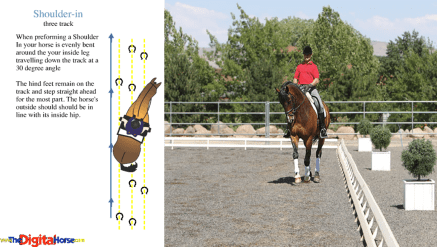
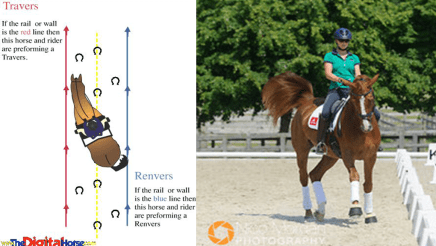
Part B: On the short side of the arena, begin to incorporate shoulder-in and haunches-in, alternating between the two.
This exercise is one that every rider from beginner to advance should have in their tool box. It tells you how well you and your horse are listening to one another and it reinforces lateral movements that help with balance and straightness.
An important thing to remember is to not let your horse get frustrated. If that happens, do something else; figure-eight the arena, and diffuse their frustration before any conflict can occur. Transitions will force your horse to use their hind end so it’s hard work for your horse.
Exercise II:
Just because we’re going back to basics doesn’t mean we ignore the jumps. Instead of working a full course, try incorporating trot jumps in your ride with the emphasis on rhythm and balance.
I’ve included a workout that Honey and I recently did to keep the jumps in our routine but still work on backing off, balancing, and finding our rhythm.
*Our video equipment is still in storage so the iPhone was our only option this time.
Share your #backtobasics videos and photos with me here and on social media @BettaBeYou so we can keep this conversation going.
When you get to know your horse, you learn to listen to and interpret what they tell you, and you will always know when something is awry.
Honey is a beautiful mare. She may be opinionated and a touch passive aggressive, but the way she moves and jumps leaves onlookers awestruck. Fortunately, as her rider, I rely on feel to know how she’s moving. Recently, I’ve been feeling like her balance and self-carriage have been waning, and nothing I did was solving the problem.
I’ve always appreciated dressage. Though I haven’t received much formal training in the discipline, I have participated in dressage clinics and traded skills with dressage riders and trainers along the way.
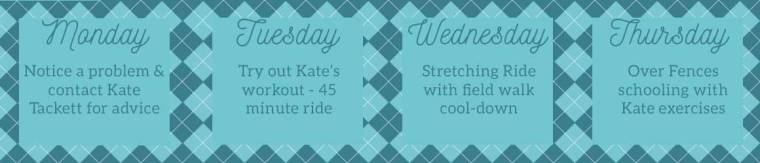
I thought to myself, there may be no one better to help me solve Honey’s problem than someone educated in dressage.
My reason for reaching out to dressage rider/trainer, Kate Tackett, is due in large part to my respect for her discipline and her familiarity with Honey. After I finished college, Kate actually leased my show jumper and turned her into one heck of a dressage horse before the year was up.
“I would say for her [Honey] a lot of transitions to keep her sitting and accepting a half halt, and lots of trot-canter-trot to help supple her back.” ~ Kate Tackett
Kate told me to focus on four things:
Trot – Halt Transitions
Canter – Trot Transition
Shoulder-In 10 meter circles
Haunches-In
Lesson Break
**My recommendation, if you’re new to lateral work, is to start at the walk. It’s best to learn on a horse that already knows what they’re doing, but nothing is impossible. If you and your horse are both still learning, start slow and focus on adding one aid at a time until your horse understands what’s being asked of them.
The next day I headed to the barn and focused on those four exercises. It was to no one’s surprise that our Kate-inspired workout left both of use drenched in sweat.
I never want to over-do Honey’s workouts, so I gave her one relaxing ride, encouraging her to stretch out her topline, before adding in our over-fences training. If you recall, Honey is a hot showjumper; like a ball of energy firing out of a cannon every time she’s pointed at a jump.
When it finally came time to incorporate fences into our workout, Honey remained true to her nature for our warm-up and through the gymnastics exercise I had set to back her off.
Really wanting her to balance up, I decided to test a theory that blended my expertise with Kate’s.
Single fences were set around the arena at approximately 3’3″ in height. That made them large enough for Honey to notice but small enough so that she didn’t have to make that great of an effort to jump. They were also set to be jumped from a long approach, designed to give Honey the maximum amount of track to build speed and run [if she so chose].
Instead of cantering directly to each fence, I practiced the following sequence:
Halt
Sitting trot, 10m circle, shoulder-in
Canter directly to the fence.
As soon as I asked for the canter following the above sequence, I could feel something was different. Instead of fire out of a canon, I felt a cool and collected horse filled with potential energy that was perfectly stored. Her hind end was lifting up and beneath her, giving my leg the opportunity to regulate her kinetic energy to the base of the jump.
Honey’s hind-end came up so well over each fence that I contemplated shortening my stirrups to stay out of her way. What amazed me was how soft I was able to be with my hands. A simple exercise in balance and suppleness gave me the jump that was perfect in every way.
The equestrian world has become largely segmented, and you don’t see many cross-disciplinary training programs anymore. While it’s important to have a focus, it’s also important to know what else is out there and what other training methods exist to help both you and your horse.
Kate Tackett is a certified equilibrium equine massage therapist and both the Assistant Trainer and Barn Manager for Eliza Sydnor at Braeburn Farm. Kate is available for both on and off-site lessons as well as equine massage therapy appointments in the Triangle/Triad area of North Carolina.
You can follow the links to contact Kate or call her at (703) 303-4697!
The one thing that drives me crazy when I’m teaching is to see my students create this outstanding partnership with their horse during our flat warm up, and then completely forget about it as soon asI put a jump in front of them.
Since I’ve already written about the importance of flatwork for every aspect of your riding, I want to talk about how to ride a course with a technical lens.
Question: What do you do when you first look to learn your course?
I want you to take a moment to consider how you approach learning a new course.
Do you;
Memorize the order of the jumps?
Plan your entry and exit from the ring (opening and closing circles)?
Memorize the order of the jumps and then review it while looking into the arena?
Do you plan your track?
Today, I want to focus on that last point; do you plan your track?
While all of the other elements are needed, I find the track to be most commonly overlooked. There are two ways to think about your track:
Consider the actual footing
Determine what you will have to do to ride the course as it’s designed.
The individuals who end up in the winner’s circle aren’t there because of luck; they are there because they met the technical challenges that the course designer presented. Whether you ride to win or you ride for personal improvement, you always need to consider the technical aspects of any given course.
One of those technical challenges is determining what track to ride to which jumps. As a hunter or equitation rider, you want to choose a track that:
Helps your horse land the correct lead
Sets you up well for your next fence
Allows for a consistent rhythm and smooth jump
For jumpers, you need to consider two things: time and accuracy. Choosing the correct track is the difference between making the inside turn or missing your next fence. A good plan means you’ll have a more balanced horse landing from each jump resulting in fewer, or no, knocked rails.
In addition to the track you ride, I also mentioned the track you’re riding on; footing. I made a mistake a few years ago at the NCHJA Annual Horse Show of taking a tight inside turn off of an oxer in our jump off. While Honey was happy to do it, and probably would have chosen that route without me, the footing was shallow and slippery. She lost her grip, and her hind end slid out from under her. Thankfully, she’s a talented horse and got herself out of the slide gracefully. However, that planning mistake cost me the rest of the weekend and resulted in a mystery lameness that was later remedied by my chiropractor (Read the Full Story).
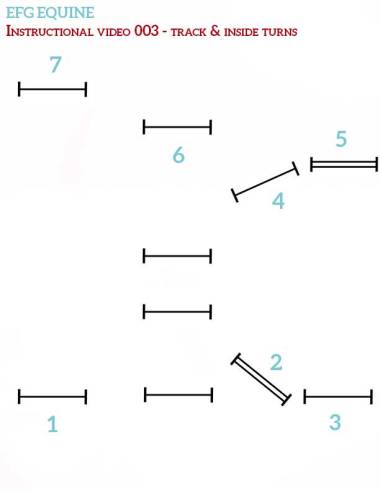
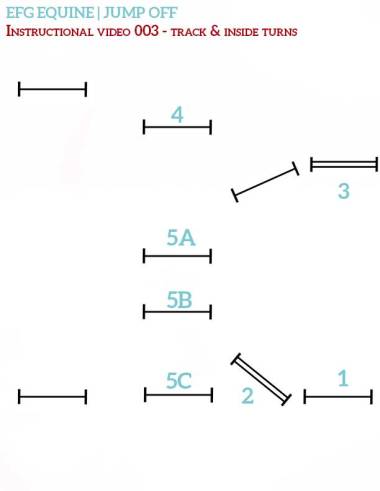
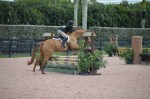
In our most recent video, Honey and I demonstrate how riding the right track can make the difference when navigating inside turns and sometimes riding blind. While the jumps are small, the concepts remain the same. Below, you can see our first course. I designed it to challenge our ability to stay balanced and calm enough to take the shortest distance between each fence.
Look at the course and figure out what your plan would be; How would you ride this course?
This jump should be fluid, out of hand, and your only concern is to ask your horse to land that right lead. Since it’s part of a line, be sure your horse knows that you’re turning into the center instead of heading straight up the long side.
Jump 2
Just looking for your next jump can change your weight distribution & communicate the turn to your horse.
This is an oxer coming out of a slower turn, so you’ll need to get your horse’s eye on the jump and support with your leg. If you look beyond jump two to jump three, you’ll see that there’s a pretty tight roll back. To give yourself the most amount of room for that inside turn, I recommend jumping the oxer left-to-right, looking in the air for your next fence, and asking for the left lead.
Jump 3
Riding an oxer naturally lengthens your horse, and we’ve just forced the tighter roll back turn to jump three. Follow and allow your horse to move up to this next fence, so you get down the line early and have a quiet jump for fence four.
Jump 4
Here you have another tight rollback turn, but this time, you’re jumping a vertical to an oxer, making it a little easier. While you want to get down the line from three to four, you don’t want to take the inside track because you’re going to want to consider jumping this fence a little right to left. Get down the line with a forward jump in, so you can shape and back-off for a quiet jump four. In the air, look for your next fence and guide your horse around the inside rollback turn.
Jump 5
You’re jumping this oxer into a blind turn to jump six, so set your horse up to make the immediate right turn by jumping in left-to-right. This will require you to balance your horse and keep them from bulging towards the barn, all while riding your chosen track.
This slideshow requires JavaScript.
Jump 6
This jump is awkward and a little blind. Ideally, you’ll want to jump this left-to-right to create a shape in-between your last two fences. Since this jump is set on the centerline and the barn is to the right, many horses will have a tendency to land right and drift towards home. Plan for this and guide your horse over fence five so they know where they’re going next.
Jump 7
Once you’ve balanced your horse; support with your leg and enjoy that final jump of the course. Allow your horse to relax a bit and take the jump in stride.
The Jump Off
Take a minute to look at the jump-off course and figure out what technical challenges are presented.
The first two fences pose the greatest challenge. This is both a tight and blind rollback turn, so a quiet jump one is key. Jumping in right-to-left will also give you some extra space to get your horse’s eye on jump two.
Jump 2
Jumping an oxer out of a blind, short turn is never an easy feat. Remember to support with leg and keep from bulging by using a direct outside leg and rein. Allow jump two with a nice release and re-balance as you canter away.
Jump 3
This oxer to oxer line rides nicely as long as you get up and go after jump two. Allow this line to flow but be aware that you’re going to need to “whoa” right after.
Jump 4
This fence is jumped towards home, in a straight line. Any horse is going to want to pick up momentum, and with my fiery jumper, that was one thing I had to account for. If you have a hot horse, intentionally jumping in slow here will save you a lot of knocked rails.
Jumps 5A 5B 5C
This combination rides as a bounce to one stride. With elements like these at the end of a course, it tests your ability to regulate throughout the entire ride. If you just “gun it,” you risk plowing through the whole combination and knocking every rail along the way. Instead, back your horse off on the approach so you can allow the combination to come naturally with your horse’s stride.
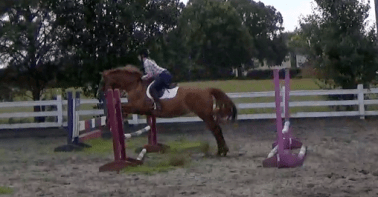
If you’re a visual learner like I am, check out my Training Video 003: Choosing Your Track and Inside Turns, and watch (with commentary) as Honey, and I ride through the two courses discussed above. You’ll be able to see the mistakes I made, and how I corrected [most of] them on our second ride through.
Remember, we are never done learning, and there’s always something to be improved upon.
*affiliate links may be included in thispost to give you an idea of my recommendations and what brands/types of apparel items are a good start to creating your equestrian wardrobe.
As an instructor, first-time equestrian parents frequently ask me what their children should wear to their riding lessons. While many facilities don’t have a dress code, there is some merit to dressing appropriately for your lessons.
There are four main elements to an appropriate riding outfit. While equestrian apparel has influenced fashion on the runways of Milan, Paris, and New York, the clothing we’re talking about today is also functional for both the rider and trainer.
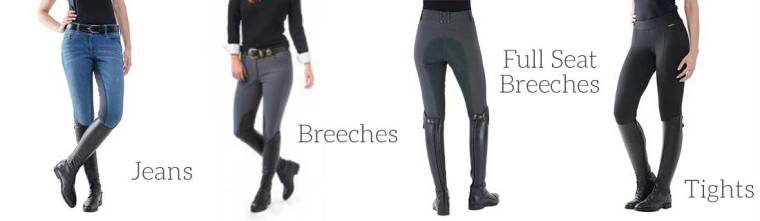
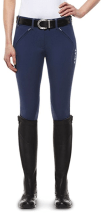
Breeches
I currently live in North Carolina; a state that remains 90 degrees (F) or above for 70% of the year. I understand why many riders come to the barn in shorts and tank tops. However, I also have scars up and down the inside of my legs from not wearing proper pants for my riding lessons. What you don’t realize, until it’s too late, is that the leather from the saddle can cause rubs and blisters.
Thankfully, there are a lot of options for breeches:
Real breeches, either high or low-rise.
Riding tights.
Jeans
Breeches
As both a trainer and a rider, I will only ride in breeches unless I’m unexpectedly getting on a horse and only have jeans in my car. The problem with riding tights is that they can be slippery and are generally deemed, “unprofessional.” While jeans are more acceptable than tights, the fabric is coarse and can damage the leather of your saddle over time.
Benefits of Breeches for the Rider
Breeches are designed for riding in an English saddle, so they provide extra grip for your leg and are sewn without irritating seams to account for the regular pressure, friction, and position while riding. Breeches also come in a variety of styles depending on what discipline you’re in, and there are a variety of colors that you can choose from.
Benefits of Breeches for the Trainer
As a coach, I need to be able to see your position while riding. Breeches are fitted and provide a middle seam in the back so that I can see where your hips and seat-bones are in the saddle.
If you are planning on competing, you will be required to wear breeches. In my experience, competition brings out nerves and anxiety that students don’t realize is there. Getting used to dressing appropriately and wearing breeches in your lessons alleviates a lot of stress in a competition. More than that, they make riding a little bit easier, and it helps your trainer give more accurate instruction.
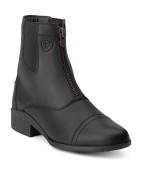
Sometimes my beginner students will come for lessons in rubber boots or sneakers. Though the only requirement for shoes is that they have a smooth sole with a slight heel, I’ve found that riders struggle to find the correct position when wearing non-equestrian footwear.
What many new riders don’t understand is that correct position isn’t meant to make you look pretty (though it does help), rather, it’s intended to keep you safe and allow both you and the horse to have a quality ride. The foundation of this correct position is in your heels.
Exercise Break! #squatchallenge
Take a minute and do a proper squat.
Your knees should be over your feet but not passing your toes, with your heels supporting the bulk of your weight allowing you to slightly lift and wiggle your toes. Your hips should be pressing back, engaging your quads while your core engages in supporting your lower back and opening your chest. If you’re at the bottom of your proper squat, with your weight in your heels and someone tries to push or pull you in one direction, you’re able to keep your balance and adjust your weight to keep from falling.
When your boots aren’t designed for riding, it inhibits your heel from stretching down far enough. This keeps you from creating your base and may even cause your foot to slide out of the stirrup.
My recommendation is to wear paddock boots to your lessons. If you are under the age of 13 and are jumping fences that are 2’3” or lower, you can wear paddock boots with your breeches. However, if you are 13+ years old OR are jumping fences higher than 2’3”, then you also need to wear half-chaps along with your paddock boots.
I recommend wearing half-chaps no matter what age or riding level because they provide added protection to your legs against any rubbing that may be caused by the stirrup leathers.
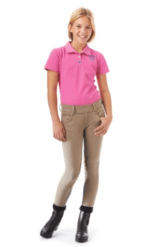
Depending on your barn, you may already have a dress code requirement for lessons. Regarding rider benefits, the shirt you wear won’t matter to you, but it will affect your trainer’s ability to see your position and give you accurate feedback.
Always choose a fitted shirt, regardless of style. When you wear baggy shirts while you ride, the wind will pick it up and cause it to blow out behind you. This makes it nearly impossible for your trainer to see how you carry your shoulders and the curve of your spine.
As both a rider and trainer, my preference for shirts during lessons is either a polo shirt or a sun shirt. When I’m schooling on my own, a fitted t-shirt is ok, but I usually ride with a collared shirt regardless.
When I was competing as a Junior (under 18 years old), my trainer required us to wear a collared shirt whenever ‘lessoning’ or schooling out of respect for her and the barn we represented.
My final note on shirt choice is to make sure you tuck it in and wear a belt. Tucking your shirt in ensures that it won’t be picked up by the wind and will create a finished, polished look.
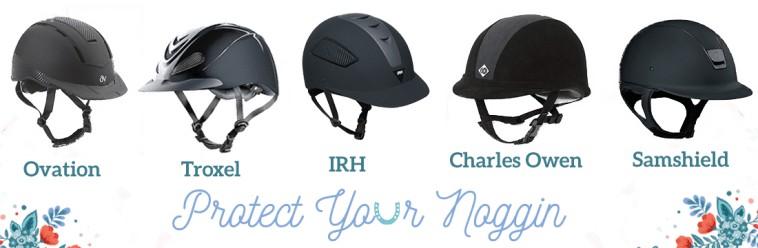
Helmet
This is the most important item for a rider, and I’m surprised at how many parents will have their children wear school-owned helmets for years.
They are expensive. However, a helmet that doesn’t fit properly won’t necessarily provide the protection needed in the event of a fall.
Have someone at a tack shop help you pick out an appropriate helmet. When you try it on, make sure it fits snug with your hair in a low ponytail. You shouldn’t be able to move the helmet by shaking your head or looking in different directions.
When you put your helmet on for your lesson, make sure your hair is pulled back and out of your face. I was required to wear a hairnet for every lesson, and I still wear one every time I ride. While your hair doesn’t have to be up, under your helmet for lessons, the hairnet will keep any wisps of hair out of your face and protect your hair from breakage.
Part of your equestrian attire is about looking professional and ready to learn. However, a greater part of dressing for your lessons is about protecting your body and giving you the best chance to succeed.
When I teach my students how to jump, we start with the basics:
Position
Flatwork
Rhythm
The jump should be a continuation of your horse’s canter. For that to happen, you need to do your flatwork and use your position to help balance your horse.
The greatest mistakes I see riders making are:
Forgetting about flatwork around the turns, resulting in an unbalanced, confused horse with not enough track to find the jump.
Having a weak position and either hitting their horse’s back with their bum or catching their horse in the mouth with their hands.
In a George Morris clinic, he explained the importance of having a strong 2-point position. He asked his rider to show the 2-point at the walk, trot, and canter, both with and without stirrups. When she began to fatigue, he told her to grab mane to help hold herself up and out of the tack.
When I first started working with them, they were still practicing your basic hunter course. Their focus was more on getting over the fence instead of riding the course. They have come a long way in the year and a half that I’ve been teaching them, and are now working on things like bending lines, roll backs, long approach single oxers, and serpentine lines. No matter what I throw at them, they take it on like champs. Despite the more challenging courses, I noticed my students were still riding each jump as a single instead of thinking ahead to land their leads and make the inside turns. Continue reading “Forget the Jump, Think Ahead”→
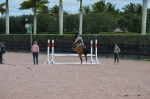
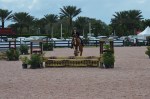
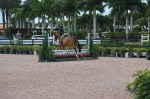
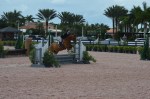
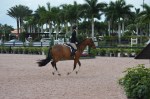
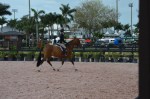
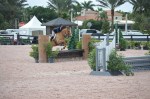
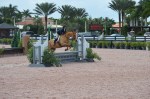
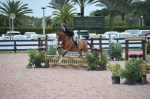
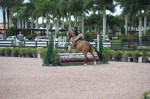
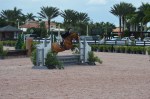
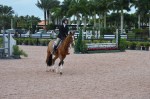
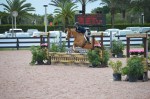
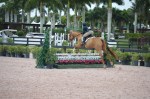
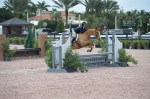
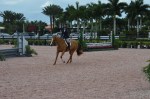
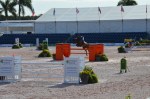
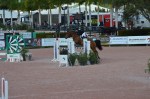
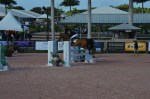
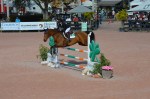
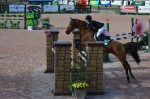
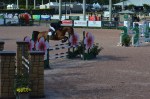
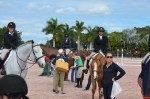
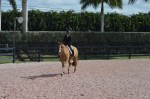
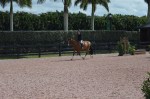
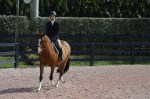
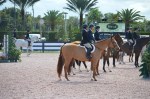
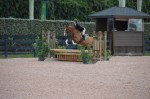
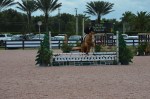
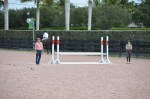
I had a great time watching the Ethel Walker Equestrian Team riders compete at WEF for the 2017 show season! These are just a few shots I got while schooling and in the show ring.