This is a great exercise I picked up from a dressage clinic I took in high school. While I have never been a dressage rider or owned a dressage saddle, I have truly come to realize the value of really great flat-work. Continue reading “Improve Transitions and Lead Changes”→
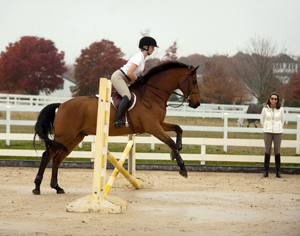
If you’re anything like me then you love to jump. . .and so does your horse. The problem is, when you don’t have a covered arena, the winter season can get you out of shape and out of practice. Not only does your horse need to regain lost strength and stamina but so do you! Not to mention, as the rider you are the “driver”. This is my slow and steady workout to get my mare, Honey, back in show jumping shape.
Week 1: Do It Without the Jumps
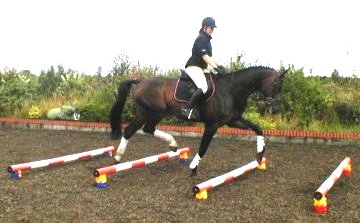
At the start of any conditioning series you really want to get a good feel for where you and your horse are as a team. The first few rides of week one I use to feel my mare out with flatwork. It’s important to have your horse listening to your aid, moving off your leg, balanced, and adjustable on the flat before you think about adding obstacles into the mix. If you have all of these flatwork elements, “checked off”, then you’re good to go with week one! My rides always start with about 10-15 minutes of flatwork focusing on transition as well as lengthening and shortening. Transitions, especially when done correctly ensuring your horse is using their hind ends and not falling forward, are excellent practices to building muscle and increasing responsiveness. After you’ve warmed up with some flatwork, add some trot poles into your workout. These are great for getting your horse to really use their muscles to pick up their feet. If you’re more advanced, raise the trot poles for an added challenge for your horse. Just be careful, I have a hot horse and we have to walk through raised trot poles before attempting to trot them because she thinks that she’s supposed to jump them. Always be listening to your horse and supporting them.
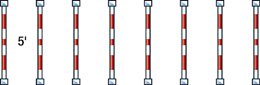
A Guide For Trot Poles – I use one big step
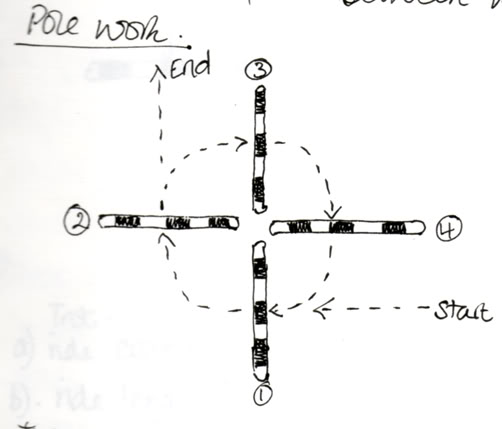
Now, the trot poles are for the horse but the canter poles are for you. Canter poles are great because they’ll help you regain your eye for distances once you start jumping but they’re easy on your horse’s legs. The exercise below will help with your eye but more so help with your seat, your position, and how much you’re supporting and helping to balance your horse. If you’re just working on you eye, I suggest single canter poles or canter pole lines, etc.
Do this at the canter: Your goal is to have the same number of strides between every pole (This is very challenging when done properly)
Week 2: Hot to Trot
Keep the fences low, either small x-rails or low verticals and keep it simple with single fences. You should still start your workout with good flatwork exercises focusing on elements of balance and adjustment that you feel is needed for you and your horse to improve. I know, I know, we all hate trot jumps but they’re actually super helpful for two reasons:
They’re great for building muscle in your horse’s hind end because they force your horse to rock back and use their haunches to jump. Remember not to let them rush the trot jumps so this can happen!
They force us, the rider, to really keep our upper body back and let the horse jump up to us instead of us jumping ahead of the horse.
Week 3: Exercises
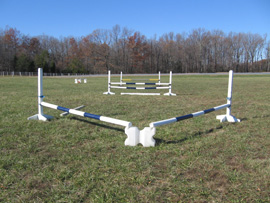
This is the time to think about all the courses you’ve jumped in the past and dissect them element by element. Keep the fences at a low height (but slightly higher than your trot jumps) and practice the course elements you set up. For me, I make sure to set up long straight lines, rollbacks, long approaches to single fences, skinnies on the short end of the arena, bending or broken lines, and even some fences set up on a serpentine. While you can’t do all of these at once you can do at least half of them and only have to set up four (4) jumps in the ring so don’t get overwhelmed. Remember, the idea here is to keep the fences low and work on the technique and execution of riding each element individually. We’re NOT putting them into a full course just yet but rather practicing so that when we do, both rider and horse are confident and ready to ride.
One example of an exercise that will work on bending lines in both directions depending on what route you take.
*Note: I never jump every day of the week. Even when practicing exercises over low fences, I’ll only do three (3) days a week of jump work with one (1) day off and three (3) days of complementary flat work.
Week 4: Set the Course
Now it’s time to put all the exercises we worked on in week three into a full course. My suggestion for you is to have the jumps set so you can ride a more simple, hunter-like, course for your first course and if all goes well, add some equitation-like elements to make it more challenging. It depends on your horse, so be sure to be listening to them, but I usually raise the jumps to a low schooling height for our full course with some trot jumps as my warm-up. For example, my mare and I show at 3’6″-3’9″ so our height for this week in our training will be 3′-3″ if she feels good over the 3′-fences. I always jump a few single fences at this height before asking her to do a full course to get a feel for how she’s jumping. Also make note of your horse’s breathing and give them plenty of breaks to stretch out and walk if they’re sounding like a freight train. Pushing them is good to an extent but I always ere on the side of caution if my mare is telling me she’s had enough.
After week four I play it by ear but if you’re curious, this is what my horse’s weekly workout schedule looks like:
Every time I tell people I’m a jumper, especially when I talk to people who mainly focus on the dressage, I can see their expression change to a smirk & it’s almost as if they’re thinking, “yeah she can jump but she probably let her flat work go in order to get there”.
Unfortunately, at one point in time that assumption would have been correct. It took my years to realize just how important your flatwork can be when you’re jumping. If I could sit with you and watch all the grand prix riders go through their courses I would love it! Since I can’t, let’s imagine for a moment that we’re at WEF in Wellington, FL & we’re watching all the top show jumpers from around the world.
Watch their approach to the fences; their positions; their seat & their aids.
It’s even better during the jump-off rounds. You can see the adjustments more clearly since they’re trying to both go clear and jump the fastest time.
Your flat work matters because your flatwork could be the reason you knock the rail, your horse stops, you get a bad distance, or you miss the jump completely. You and your horse are a team when you ride, whether you’re jumping or flatting your horse should be listening to your aids and you should be listening to your horse. If you do your flatwork properly, then you’ll be able to respond to any changes that may occur in your course.
I remember I was riding a 5-year old on his first trip down to Palm Beach, FL for WEF & he spooked at everything! It made it that much more important that I used my seat & did my flat work in the corners not only to set him up for the next fence but to also bring his attention back to me so that he was listening to me and not the spectators, announcers, food stand owners, or other exhibitors.
The horse I have now requires flat work in order to bring her back after every fence. She’s a hot horse & a jumper meaning I don’t have the luxury of wide turns to re-group and focus on flat work so I have to be direct & clear with her in a short period of time without becoming too reliant on one aid or another. Here’s where “flatwork” as a whole comes in. I can’t just pull a horse’s teeth out or spur her to make her listen to me…I have to work with her, as a teammate, and communicate using all my aids. With proper flatwork training at home, it’s a lot easier for me to make corrections quickly AND properly in order to ensure a clean and quick show jumping round.
Need some flatwork exercises?
True-bend & Counter-bend: try changing the bend every 8-10 trot steps and make sure that you’re not only changing the bend of their neck but rather you’re changing their entire bend using all your aids (leg, seat, & then hands last).
Transitions: I know it may sound simple but the more transitions you do, the better. Not only will it build muscle for your horse but it will also improve responsiveness between horse and rider. Try doing transitions between gaits as well as transitions within gaits. To really challenge yourself, you can set two ground-poles 7 (this number is up to you) canter strides apart. Go through the poles in 7 strides, then lengthen the stride the next time through to get 6 strides, then lengthen more to get 5 strides, then go back to 7 strides, then shorten the next time through the poles to get 8 strides, then shorten even more the next time to try and get 9 strides. Remember, the key here is not to ride like a bat out of hell for fewer strides or ride like you’re going to pull your horse’s teeth out to fit the additional strides, rather ride from your seat and leg for both with your hands as an additional aid. Your body can do wonders in terms of communicating with your horse so try and open that line of communication.
Spiral Circles: You can do these at the walk, trot, and canter if you want depending on your level of experience. Start on a 20-meter circle and as you keep going around the circle you continue to make it incrementally smaller. Make sure the inward movement is coming from your leg asking your horse to move its whole body in, like you would if you were asking for a leg-yield. You’ll feel what movement is right for your horse. As the circle becomes smaller and smaller it will be harder and harder for your horse to continue the forward movement and will require immense support from your seat and leg as well as immense work from your horse’s hind end (you’re essentially asking for haunches-in). When you’re ready, use your inside aids to push your horse outwards to incrementally widen the circle (now essentially asking for haunches-out). Then switch directions and do it again after giving your horse the chance to trot on a loose rein and stretch their neck and back out.
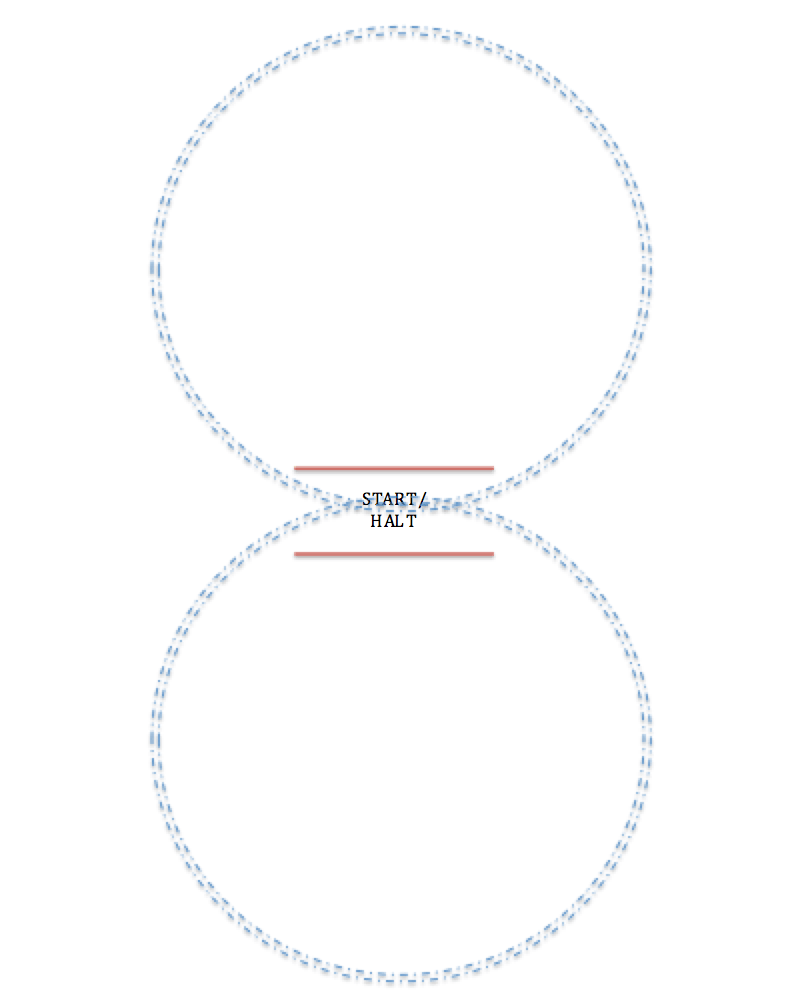
Counter Canter: This won’t be easy for many horses but it’s an excellent exercise for both horse and rider. Start with trying to counter-canter (hold the canter intentionally on the wrong lead) all the way around the ring. If you’re already there, here’s an exercise that will be helpful if you’re showing in upper-level equitation or if you’re just looking for a challenge. Pick up your counter-canter up the long-side of the arena. Hold it around the short end through both the corners. Continue you’re counter-counter half-way down the opposite long-side then push your horse onto the quarter-line before turning them in towards the rail to change direction (while holding the same lead) to end up on the proper lead & halt in the corner.